How to Fix “Unable to Set Default Printer Error 0x00000709”
The steps given below are the same for all Windows 7, 8 and 10 operating systems. Follow them carefully in their correct order to fix this error.
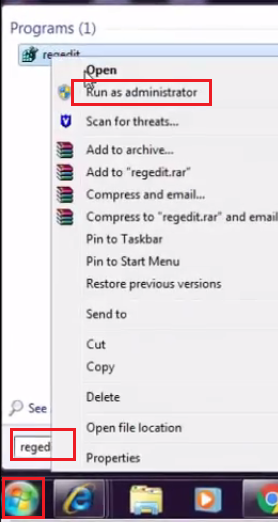
- Click ‘Start’ button and search ‘regedit’ in search box. From the search results, right click ‘regedit’ and choose ‘Run as administrator’.
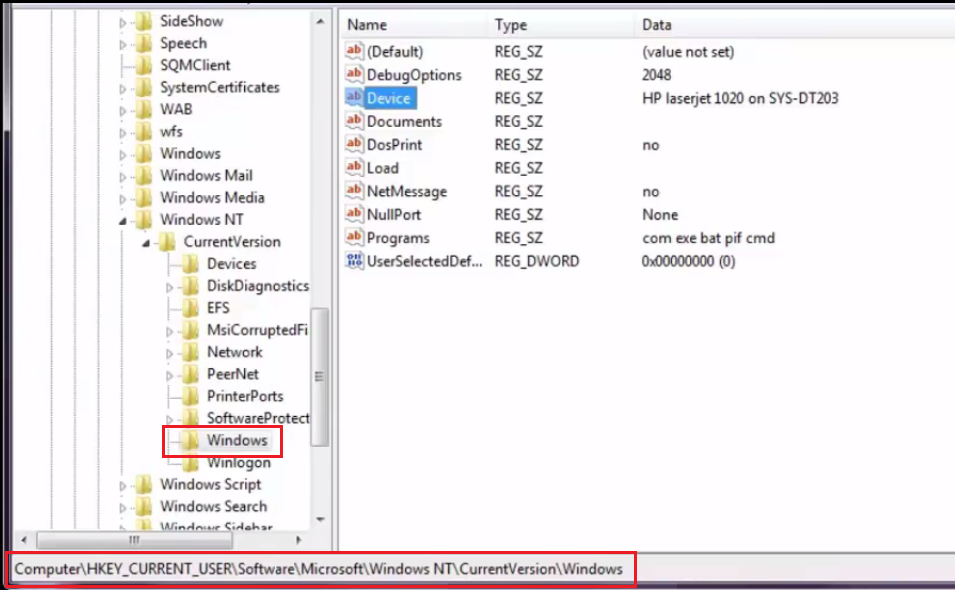
- In the Registry Editor window, select ‘HKEY_CURRENT_USER’, inside that select ‘Software’, inside it choose ‘Microsoft’, inside it ‘Windows NT’, inside that ‘Current Version’ and inside it ‘Windows’. Note that each folder is a subset of the previous folder as shown below.

- Finally, the Registry Editor should look like shown below and at the bottom or top, you should see the following address: ‘computer/HKEY_CURRENT_USERSoftwareMicrosoftWindowsNTCurrentVersionWindows’.
- Now right click ‘Windows’ folder and select ‘Permissions’.

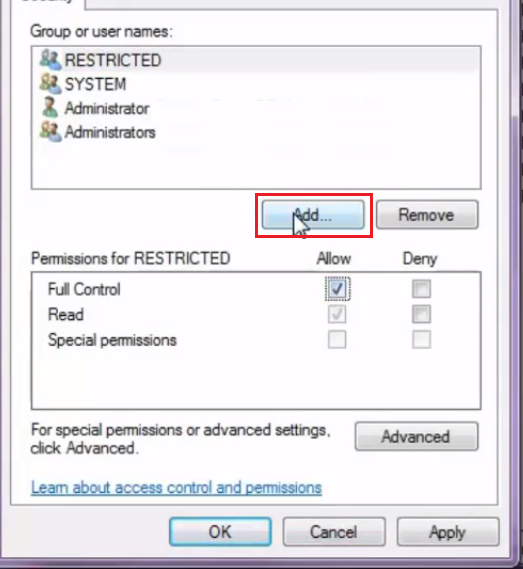
- Click ‘Add’ button.
- In the object names box type ‘everyone’ and click ‘Check Names’ button.

- Once ‘Everyone’ has been recognized, click on ‘OK’.|

- In the Permissions window, choose ‘Everyone’, check ‘Full Control’ and ‘Read’ checkboxes in ‘Allow’ column. Then, click ‘Apply’ and finally ‘OK’.

- Close Registry Editor program.

- That’s it!! You have made the necessary changes to your Windows Registry.
- Now, restart your computer and you will be able to set your preferred printer as the new default printer without encountering any error.
The Windows Error 0x00000709 is most common among users who have multiple printers installed on their computer. However, if you follow the steps given above, then you will be able to fix this problem permanently in just a few minutes.
موضوعات مرتبط: ماکروسافت ، ترفند
تاريخ : یکشنبه بیست و یکم فروردین ۱۴۰۱ | 8:19 | نویسنده : حمید مقصودی |