Below are the steps to resolve the error with the 0x800F020B code.
- Check Windows Programs and Features and uninstall the Kerio VPN client if it's listed there.
- In Windows, navigate to Start > Run.
- Run Regedit.
- Delete this key HKEY_LOCAL_MACHINE\SOFTWARE\WOW6432Node\Kerio

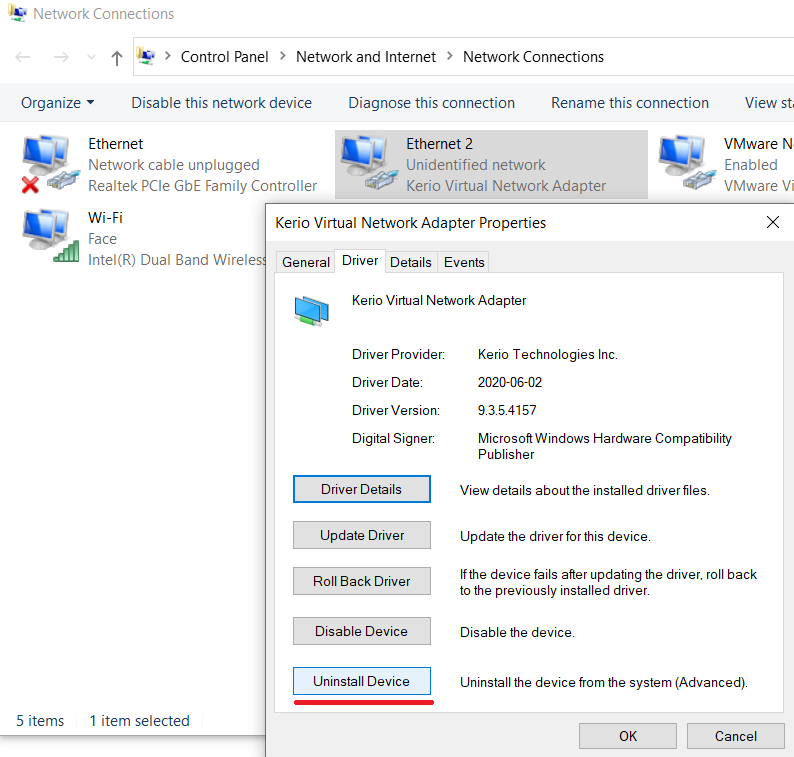
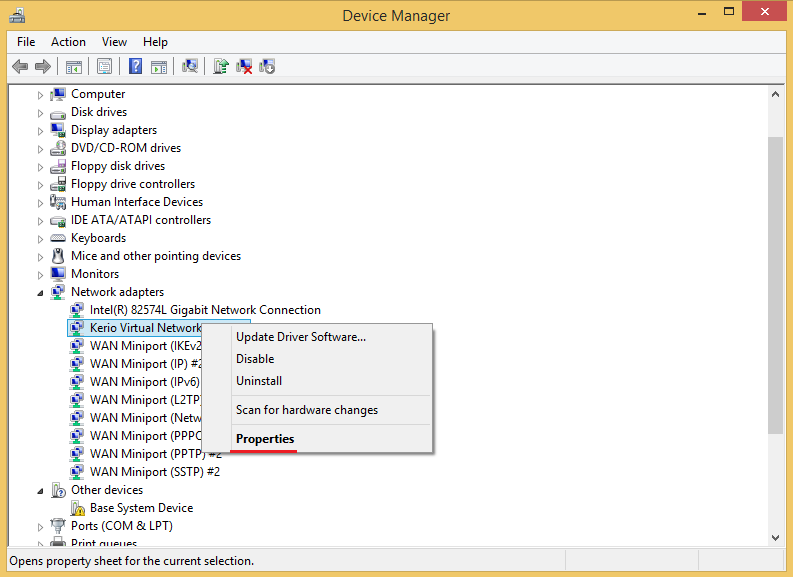
- Navigate to Device Manager > Network Adapter and Uninstall the Kerio Virtual Network Adapter. Alternatively, open Control Panel -> Network and Internet -> Network Connections -> right-click Kerio Virtual Network Adapter -> in Driver tab click Uninstall Device.
- If you see WAN Miniport adapters, please uninstall all of them. It is normal if they are not being removed from the list after you uninstall.
- Reboot the PC.
- Download and Install an older version of VPN Client. You might experience the same error as on the above screenshots.
- Download the Kerio VPN Recovery tool.
- Disable any local antivirus running on the machine.
- Run KerioVPNRecovery.exe as Administrator.
- Unblock the installer.
Right-click the .exe file, go to Properties > Unblock and Run it as Admin.
- You may now install the latest version of Kerio VPN Client.
Below are the steps to resolve the error with the 0x800F0244 code.
- Download the attached VPN.zip file and extract it.

- Navigate to Control Panel > Device Manager.
- Click Network Adapters > Kerio Virtual Network Adapter.
- Right-click and select Properties.
- Go to the Details tab, select Inf name from the Property dropdown.
Copy the name displayed in the Value section (like oem6.inf or oem22.inf). Your name of the file might be different.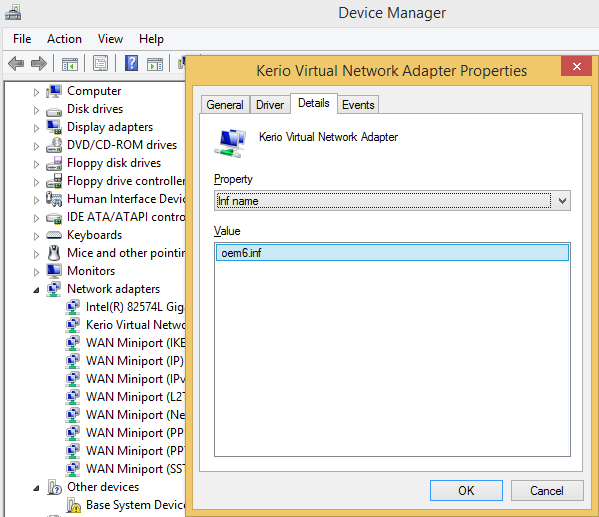
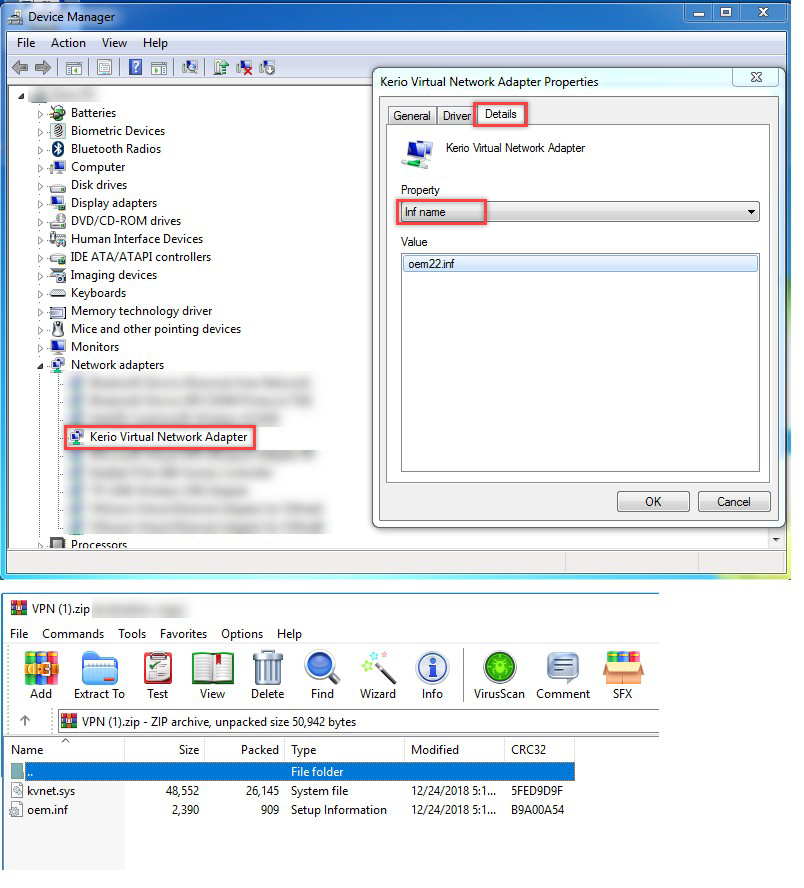
- Rename the oem.inf file from VPN.zip archive to match the name from Properties menu in the previous step and copy it to C:\Windows\INF.
- Copy kvnet.sys file from VPN.zip archive to C:\Windows\System32\drivers.
- Try to install the latest public release again.
Confirmation
Kerio VPN Client can be installed successfully.
موضوعات مرتبط: متفرقه
تاريخ : سه شنبه بیستم اردیبهشت ۱۴۰۱ | 8:50 | نویسنده : حمید مقصودی |