insert
the Forefront TMG 2010 DVD in your DVD drive. Then you will see
Welcome to Microsoft Forefront TMG page.( Note: If your computer has
Auto-Run enabled). To begin the Forefront TMG 2010 Installation,
please click on Run Preparation Tool on the Welcome page.

2. On Welcome to the Preparation Tool for Microsoft Forefront Threat Management Gateway (TMG) page , click Next

3. On License Agreement page, read the MICROSOFT SOFTWARE LICENSE TERMS and select I accept terms of the License Agreements

4. On the Installation Type page, select Forefront TMG services and Management and click Next

5.
On Preparing System page, it will take a few minutes to complete to
installs and configures the required Windows Roles and Features.

6. On the Preparation Complete page, verify checkmark on Launch Forefront TMG Installation Wizard and click Finish.

7. On the Welcome to the Installation Wizard for Forefront TMG Standard page, click Next

8. On the License Agreement page, select I accept the terms in the license agreement and click Next

9. On the Customer Information page, enter your User Name, Organization and Product Serial Number and click Next

10. On the Installation Path page, choose the Installation path for Forefront TMG and click Next

11. On the Define Internal Network page, click Add

12. On the Addresses page, click Add Adapter

13. On the Select Network Adapters page, select the network adapter which represents the Internal Network and click OK

14. In the Addresses dialog box, verify the IP address ranges and click OK

15. On the Define Internal Network page, click Next

16. On the Services Warning page, click Next

17. On the Ready to Install the Program page, click Install

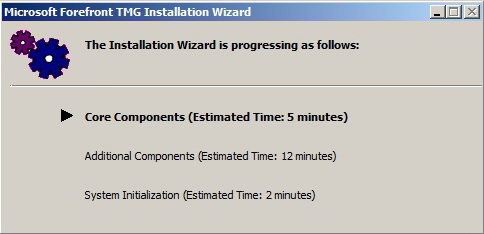
18. After We click Install Tab, Installation begin start Installing Forefront TMG Start


19.
On the Installation Wizard Completed page, put a checkmark in the
Launch Forefront TMG Management when the wizard closes and click Finish

20. Now we will see the first page for the Getting Started Wizard page, click Configure network settings

21. On the Welcome to the Network Setup Wizard page, click Next

22. On the Network Template Selection page, select Edge firewall and click Next

23.
On the Local Area Network (LAN) Settings page, from the Network
adapter connected to the LAN drop down list, select Internal and click
Next

24. On the Internet Settings page, select External and click Next

25. On the Completing the Network Setup Wizard page, click Finish

26. Again we are back to the Getting Started Wizard page, this time we need to click Configure system settings

27. On the Welcome to the System Configuration Wizard page, click Next

28. On the Host identification page, click Next

29. On the Completing the System Configuration Wizard page, click Finish

30. Again on the Getting Started Wizard page, now click Define deployment options

31. On the Welcome to the Deployment Wizard page, click Next

32. On the Microsoft Update Setup page, select Use the Microsoft Update service to check for updates (recommended)

33. On the Forefront TMG Protection Features Settings page, click Next

34. On the NIS Signature Update Settings page, click Next

35. On the Customer Feedback page, click Next

36. On the Microsoft Telemetry Reporting Service page, select Basic or Advanced and click Next

37. On the Completing the Deployment Wizard page, click Finish

38. Now we are finally finished with Getting Started Wizard and click close

39. At last the Forefront TMG Console opens. Then close the Forefront TMG Console.

40. After that Install Forefront TMG Service Pack 1